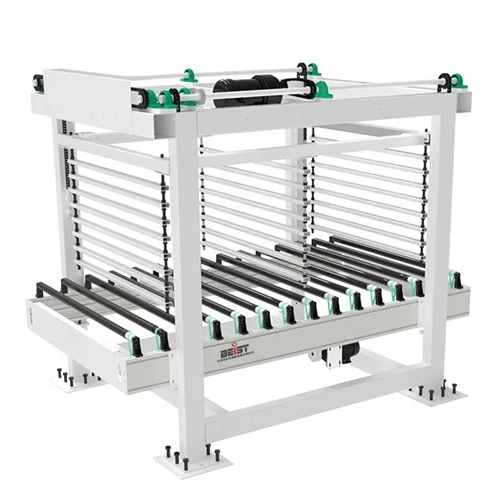
Ensuring the alignment of the conveyor on a lift table with a conveyor top is a critical aspect of maintaining the efficiency and safety of material handling operations. As a supplier of Lift Tables with Conveyor Tops, I understand the importance of this process and have gathered valuable insights to share with you.
Understanding the Basics of Conveyor Alignment
Before delving into the alignment process, it's essential to understand the basic components of a lift table with a conveyor top. The conveyor is typically mounted on the lift table, which can be raised or lowered to different heights. The alignment of the conveyor ensures that the materials are transported smoothly and accurately from one point to another.
The alignment process involves adjusting the position of the conveyor so that it is parallel to the floor and perpendicular to the direction of travel. This ensures that the materials are transported in a straight line and reduces the risk of jams or misalignments.
Steps to Ensure Conveyor Alignment
Step 1: Initial Inspection
The first step in ensuring conveyor alignment is to conduct a thorough inspection of the lift table and the conveyor. Check for any signs of damage or wear, such as loose bolts, worn bearings, or misaligned rollers. Make sure that all components are in good working condition before proceeding with the alignment process.
Step 2: Determine the Alignment Points
Next, you need to determine the alignment points on the conveyor and the lift table. These points are typically marked on the conveyor frame or the lift table surface. Use a straightedge or a laser alignment tool to ensure that the alignment points are in a straight line.
Step 3: Adjust the Conveyor Position
Once you have determined the alignment points, you can start adjusting the position of the conveyor. Use a level to ensure that the conveyor is parallel to the floor. If the conveyor is not level, adjust the height of the lift table or the conveyor legs until it is level.
Step 4: Check the Conveyor Tension
After adjusting the conveyor position, check the tension of the conveyor belt. The belt should be tight enough to prevent slipping but not too tight that it causes excessive wear on the belt or the rollers. Use a tension gauge to measure the tension of the belt and adjust it as needed.
Step 5: Verify the Alignment
Once you have adjusted the conveyor position and tension, verify the alignment using a straightedge or a laser alignment tool. Make sure that the conveyor is parallel to the floor and perpendicular to the direction of travel. If the alignment is not correct, make further adjustments until it is.


Tools and Equipment for Conveyor Alignment
To ensure accurate conveyor alignment, you will need the following tools and equipment:
- Straightedge: A straightedge is used to check the alignment of the conveyor and the lift table. It can be made of metal, wood, or plastic.
- Laser Alignment Tool: A laser alignment tool is a more accurate and efficient way to check the alignment of the conveyor. It projects a laser beam onto the conveyor and the lift table, allowing you to easily see if the alignment is correct.
- Tension Gauge: A tension gauge is used to measure the tension of the conveyor belt. It can be a mechanical or digital gauge.
- Wrenches and Screwdrivers: You will need a set of wrenches and screwdrivers to adjust the position of the conveyor and the lift table.
Common Problems and Solutions
Problem: Conveyor Belt Slipping
If the conveyor belt is slipping, it could be due to a loose belt, worn rollers, or a dirty belt. To solve this problem, check the tension of the belt and adjust it as needed. Clean the belt and the rollers to remove any dirt or debris. If the rollers are worn, replace them.
Problem: Conveyor Misalignment
If the conveyor is misaligned, it could be due to a loose conveyor frame, worn bearings, or a damaged lift table. To solve this problem, check the alignment of the conveyor and the lift table using a straightedge or a laser alignment tool. Tighten any loose bolts or screws and replace any worn bearings or damaged components.
Problem: Conveyor Jams
If the conveyor is jamming, it could be due to a blockage in the conveyor path, a misaligned conveyor, or a worn conveyor belt. To solve this problem, remove any blockages from the conveyor path and check the alignment of the conveyor. If the conveyor belt is worn, replace it.
Importance of Regular Maintenance
Regular maintenance is essential to ensure the proper alignment and operation of the conveyor on a lift table with a conveyor top. Here are some maintenance tasks that you should perform regularly:
- Clean the Conveyor: Regularly clean the conveyor belt and the rollers to remove any dirt or debris. This will prevent the belt from slipping and reduce the risk of jams.
- Check the Tension: Check the tension of the conveyor belt regularly and adjust it as needed. This will ensure that the belt is tight enough to prevent slipping but not too tight that it causes excessive wear on the belt or the rollers.
- Inspect the Components: Regularly inspect the conveyor frame, the lift table, and the rollers for any signs of damage or wear. Replace any worn or damaged components as soon as possible.
- Lubricate the Moving Parts: Lubricate the moving parts of the conveyor and the lift table regularly to reduce friction and wear.
Conclusion
Ensuring the alignment of the conveyor on a lift table with a conveyor top is a critical aspect of maintaining the efficiency and safety of material handling operations. By following the steps outlined in this blog post and performing regular maintenance, you can ensure that your conveyor is properly aligned and operating smoothly.
If you are in the market for a Electric Hydraulic Lift Table, Powered Roller Conveyor Lift Table, or E Shape Lift Table, we are here to help. Our team of experts can provide you with the guidance and support you need to choose the right lift table for your specific needs. Contact us today to learn more about our products and services and to start a procurement discussion.